

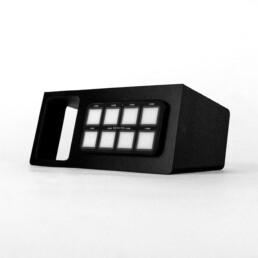
Information on Auxbeam/Switchpros
In this article, I will show you how to install our Switch-Pros Switch Panel Mount or Auxbeam Switch Panel Mount on the 2022+ Toyota Tundra’s center console utilizing a clean no-wire solution to pass through the keypad wire and a charging cable (optional) to the factory Qi Wireless Charging compartment.


There was a lot of space in the center console area so we started there. Tested on a 2023 Tundra HV model, we routed the Auxbeam 8 Gang fuse box in the back seat, where the battery is located on the hybrid models, and routed the keypad wire down the door trim, underneath the driver seat, and up through the center console.
For non Hybrid models, the wiring will just come from the engine side through the driver side footwell firewall. There is a circular rubber grommet underneath.
We drilled a 1″ diameter hole in the back portion of the center console to route the keypad wire through a grommet. While we were there, we also decided to install another grommet in the main center console storage area to route a USB cable charging cable which exits the same grommet as the keypad to provide a clean no-wire look to charge accessories.
Auxbeam/Switchpros Install DIY
1. Remove center console storage compartment
1.1 NitroZ18Fishing has a pretty cool video demonstrating how to disassemble the interior components on the 2022+ Tundra. You don’t need to disassemble the entire dash as he did, but only remove the cup holder portion of the center console area.
2. Install the first of two rubber grommets
2.1 The first grommet location is inside the larger center console storage box. Below to the right of the coin holders, there is a small area to drill a hole which will have a clear path on the other side – away from wires or any blockage.
I ended up removing the rubber pad liners in the storage box and removed the 12mm bolts, but you don’t need to do that.

2.2 Use a 1″ spade drill bit to create a hole, as pictured.

2.3 Install one of the 1″ rubber grommets, as supplied in the kit.

3. Install the second rubber grommet
3.1 This grommet will be placed on the cup holder side and is where the cable will exit to feed the Qi Charging area. Use a 1″ spade drill bit to create a hole aligned in the middle, but closer to the passenger side cup holder.

3.2 Install the 1″ rubber grommet into the hole.

3.3 Feed the Switch-Pros or Auxbeam keypad cable (and a USB charging cable if desired) from the main large storage compartment, through both grommets, and finally out the other side.

4. Install the Switch-Pros/Auxbeam Switch Panel Keypad Mount
4.1 There is a small slot on the Switch Panel Keypad Mount to allow the cable to pass through the mount. Installation is complete!

